

When you’re remodeling your home, swapping in new windows is one of the smartest moves you can make. Not only do fresh windows boost curb appeal and comfort, but they also help your energy bills stay in check. That said, installing windows during a remodel isn’t as simple as pulling out the old and popping in the new. Below, we’ll walk through everything you need to know—how to choose between insert versus full-frame replacements, pick the right materials, and get the best energy performance. We’ve even included a comparison table, handy checklists, and a thorough FAQ to answer your most pressing questions. Wherever you see a link, you can click through for more detail.
1. Why Proper Window Installation Makes a Difference
Energy Efficiency
Even the best windows can underperform if they aren’t sealed correctly. Gaps and air leaks hurt your home’s U-Factor and Solar Heat Gain Coefficient (SHGC), meaning more heat loss in winter and unwanted heat gain in summer. A tight, carefully flashed installation keeps your HVAC system from working overtime.
Learn more about how ENERGY STAR® ratings help you save: Energy.gov
Comfort & Indoor Air Quality
Drafty windows create cold spots in winter, which can lead to condensation and even moisture-related issues. Properly installed windows seal out drafts, reduce indoor humidity problems, and keep your living spaces feeling perfectly balanced, no matter the season.
Structural Health
Older frames can hide rot, mold, or framing damage. A full-frame replacement gives you a chance to inspect and repair that rough opening—preserving the integrity of the wall system and preventing bigger issues down the line.
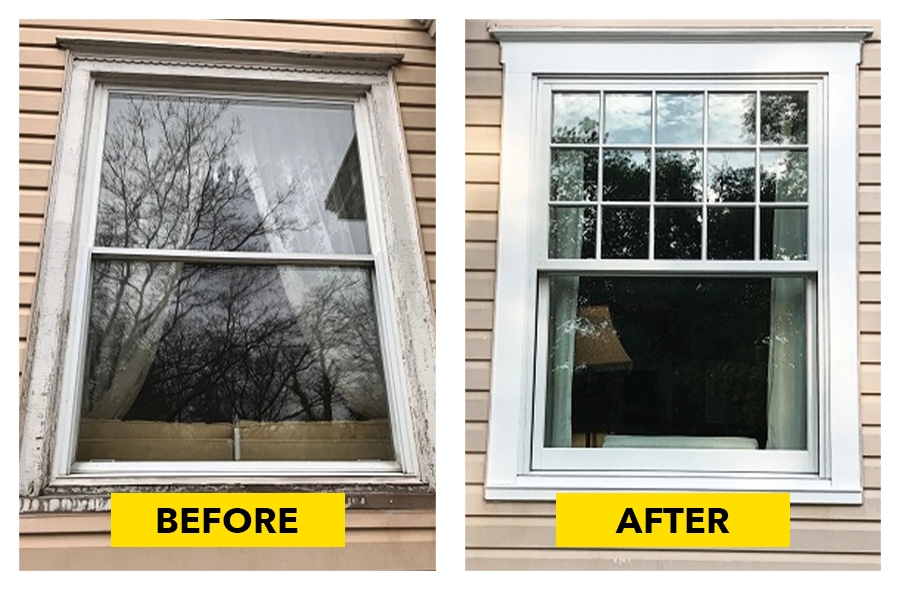
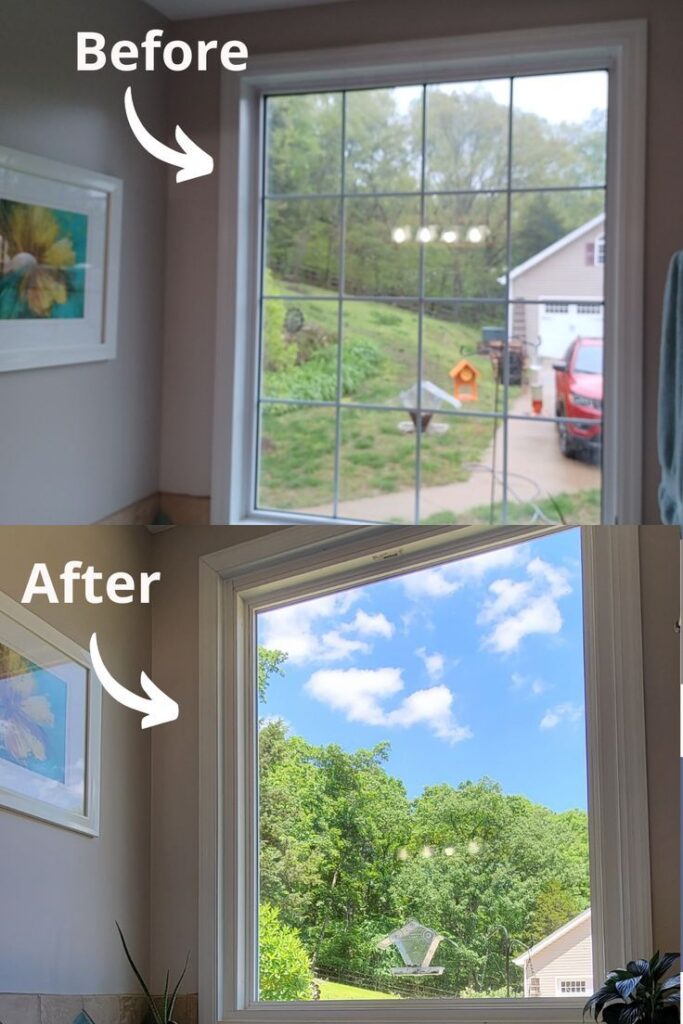
Curb Appeal & Resale Value
New windows instantly refresh your home’s exterior. In fact, most homeowners recoup 70–80% of their window-replacement cost when they sell. Crisp new profiles, clean trim lines, and updated grids modernize any façade.
For more on how windows affect resale, check out: The Spruce
2. Insert vs. Full-Frame Replacement
Insert (Pocket) Replacement
- Process: A new window unit “drops” right into your existing frame. The jambs and trim stay in place.
- Pros:
- Lower labor cost and faster install—often just 1–2 hours per window.
- Keeps your interior and exterior trim intact.
- Less mess and minimal drywall or siding repair.
- Cons:
- Only works if the existing frame is square, level, and free of rot.
- You can’t add deeper insulation around the frame—energy gains are more modest.
See details on insert installs: This Old House
Full-Frame Replacement
- Process: The entire window, including jambs, head, and sill, is removed. You’re left with a bare “rough opening” that can be rebuilt or reframed as needed.
- Pros:
- Gives you total access to fix rot or damaged framing.
- Allows you to add insulation (spray foam or rigid foam) around the new frame.
- Option to resize the opening or switch to a new window style.
- Cons:
- Higher cost for labor and materials—typically 3–5 hours per window.
- You’ll need to reinstall or replace all interior and exterior trim.
- More disruption to your walls, siding, or brickwork.
More on full-frame methods: vindovandglass.com
3. Step-by-Step Remodel Window Installation
A. Measure & Assess
- Take Rough Opening Measurements
- Measure width and height at three points (top, middle, bottom).
- Use the smallest measurement to ensure your new unit will fit properly.
- Inspect the Existing Frame
- Look for rot, mold, water damage, or warping.
- Confirm the frame is square and level—any issues here will affect your choice of insert vs. full-frame.
- Decide on Insert or Full-Frame
- If the existing frame is solid, an insert can save time and money.
- If you discover damage or want to change styles (e.g., from single hung to casement), go full-frame.
B. Select Your Window Type
- Material Options:
- Vinyl: Budget-friendly, low maintenance, and good thermal performance.
- Fiberglass: Extremely stable (minimal expansion/contraction), paintable, and long-lasting.
- Aluminum-Clad Wood: Combines the warmth and insulation of wood inside with a weather-proof aluminum shell outside.
- Composite: Engineered materials blend the best properties of wood and plastic for maximum durability.
- Glazing & Performance:
- Double-Pane vs. Triple-Pane:
- Triple-pane adds extra R-value and better soundproofing, but at a higher price tag.
- Low-E Coating:
- A microscopically thin metallic layer that reflects infrared heat back inside during winter and blocks solar heat during summer.
- Look for ENERGY STAR® labels to match coatings to your climate.
- Gas Fill (Argon/Krypton):
- Inert gas between the panes further reduces conductive heat loss.
- Double-Pane vs. Triple-Pane:
Browse ENERGY STAR® window criteria: Energy.gov/ENERGYSTAR
C. Prepare the Opening
- For Full-Frame:
- Remove the existing window, trim, and any flashing.
- Inspect the rough opening for rot or water damage and make repairs as needed.
- Install a sloped sill or pan flashing to direct water out.
- For Insert:
- Remove old sashes and any interior stops.
- Clean and square up the pocket so the insert can slide in smoothly.
D. Install the New Window
- Shims & Level
- Place shims at each corner (and occasionally mid-span) to keep the frame plumb and square.
- Secure the Unit
- Full-Frame: Use screws through the flange into the sheathing, following manufacturer specs.
- Insert: Snap the unit into existing jambs, or nail the nail fin if your insert kit includes one.
- Seal & Flash
- Full-Frame: Apply flashing tape over the window flange—top, sides, and last on the bottom—to create a waterproof envelope.
- Insert: Seal gaps with low-expansion foam insulation and self-adhered flashing tape or caulk any remaining small gaps to block air and moisture.
Detailed flashing best practices: Care And Repair
E. Finish Interior & Exterior
- Reinstall or replace your trim (interior casing and exterior trim).
- Caulk the exterior perimeter with a high-quality silicone or polyurethane caulk rated for freeze-thaw conditions.
- Test the window: open, close, lock, and (if applicable) tilt in to be sure everything operates smoothly.

4. Comparison Table: Insert vs. Full-Frame Replacement
| Parameter | Insert Replacement | Full-Frame Replacement |
|---|---|---|
| Typical Cost (Installed) | $300–$600/window | $600–$1,200/window |
| Installation Time | 1–2 hours/window | 3–5 hours/window |
| Structural Access | Limited (existing frame) | Full (new rough opening) |
| Energy Efficiency Gain | Moderate (uses old frame) | High (new frame + insulation) |
| Aesthetics & Trim | Keeps existing trim | New trim design possible |
| Ideal When | Frame in good shape | Frame damaged or outdated |
5. Tips for a Smooth Remodel Installation
- Check Local Codes & Permits
- If you’re changing the size or head height of your window opening, most municipalities require a building permit.
- Even for like-for-like replacements, some areas still have specific flashing or egress requirements—confirm before you buy.
- Inspect Flashing & Drainage
- A properly sloped sill and correctly installed flashing tape or pan-flash system are vital to prevent water intrusion.
- Make sure your installer follows best practices for window wraps and weep holes.
- Use Quality Sealants
- Exterior caulks should be silicone or polyurethane and rated for your climate’s freeze-thaw cycles.
- Inside, use paintable acrylic latex caulk if you plan to paint trim later.
- Consider Professional Installation
- Even if you’re handy, certified installers minimize the risk of leaks and voiding your window warranty.
- Many manufacturers require certified installation to back their product warranties.
- Plan Around the Weather
- Aim to install windows during mild, dry weather. Caulk and foam sealants need time to cure properly.
- Avoid slamming open or closed if sealants are still setting.
6. Frequently Asked Questions
Q: How do I decide between insert and full-frame?
- Insert Replacement: Choose this if your existing frame is square, level, and free of rot. It’s faster, cleaner, and cheaper.
- Full-Frame Replacement: Opt for a full-frame when you see rot, mold, or warping in the current opening—or if you want to change the shape or size of your window.
More about choosing the right method: This Old House
Q: How long does the whole remodel install take?
- Inserts: Most install in 1–2 hours per window, including sealing and trim work.
- Full-Frame: Plan on 3–5 hours per window—this includes removing the old unit, flashing, insulating, wall repair, and trim installation.
Q: Will new windows actually cut my energy bills?
Yes—properly installed ENERGY STAR® windows can save 7–15% on annual heating and cooling costs. For maximum savings, look for a low U-Factor and the right SHGC for your climate (north vs. south exposure).
Energy-saving details here: Energy.gov
Q: Do I need to replace the interior trim?
- Insert Replacement: You can usually reuse your existing trim unless you want to refresh its style.
- Full-Frame Replacement: Since you’ve removed the entire existing unit, you’ll need new interior and exterior trim. This gives you a fresh palette for color and design.
Q: How should I maintain my newly installed windows?
- Clean frames and glass monthly with mild detergent and water.
- Inspect seals, weatherstripping, and caulk lines annually. Recaulk or replace weatherstripping if you notice drafts or cracks.
- Lubricate hardware—locks, hinges, and handles—twice a year for smooth operation.
By following these steps—choosing the right replacement method, selecting high-quality materials, and ensuring professional installation—you’ll end up with windows that look great, perform well for decades, and help keep your energy bills in check. For deeper dives into specific techniques and performance specs, click through the authoritative links provided.